所用项目及服务器
ThinkPHP:https://github.com/top-think/framework
think-captcha:https://github.com/top-think/think-captcha
captcha_trainer (训练):https://github.com/kerlomz/captcha_trainer
captcha_platform (部署):https://github.com/kerlomz/captcha_platform
MuggleOCR:https://pypi.org/project/muggle-ocr
captcha_trainer 作者介绍:https://www.jianshu.com/p/80ef04b16efc
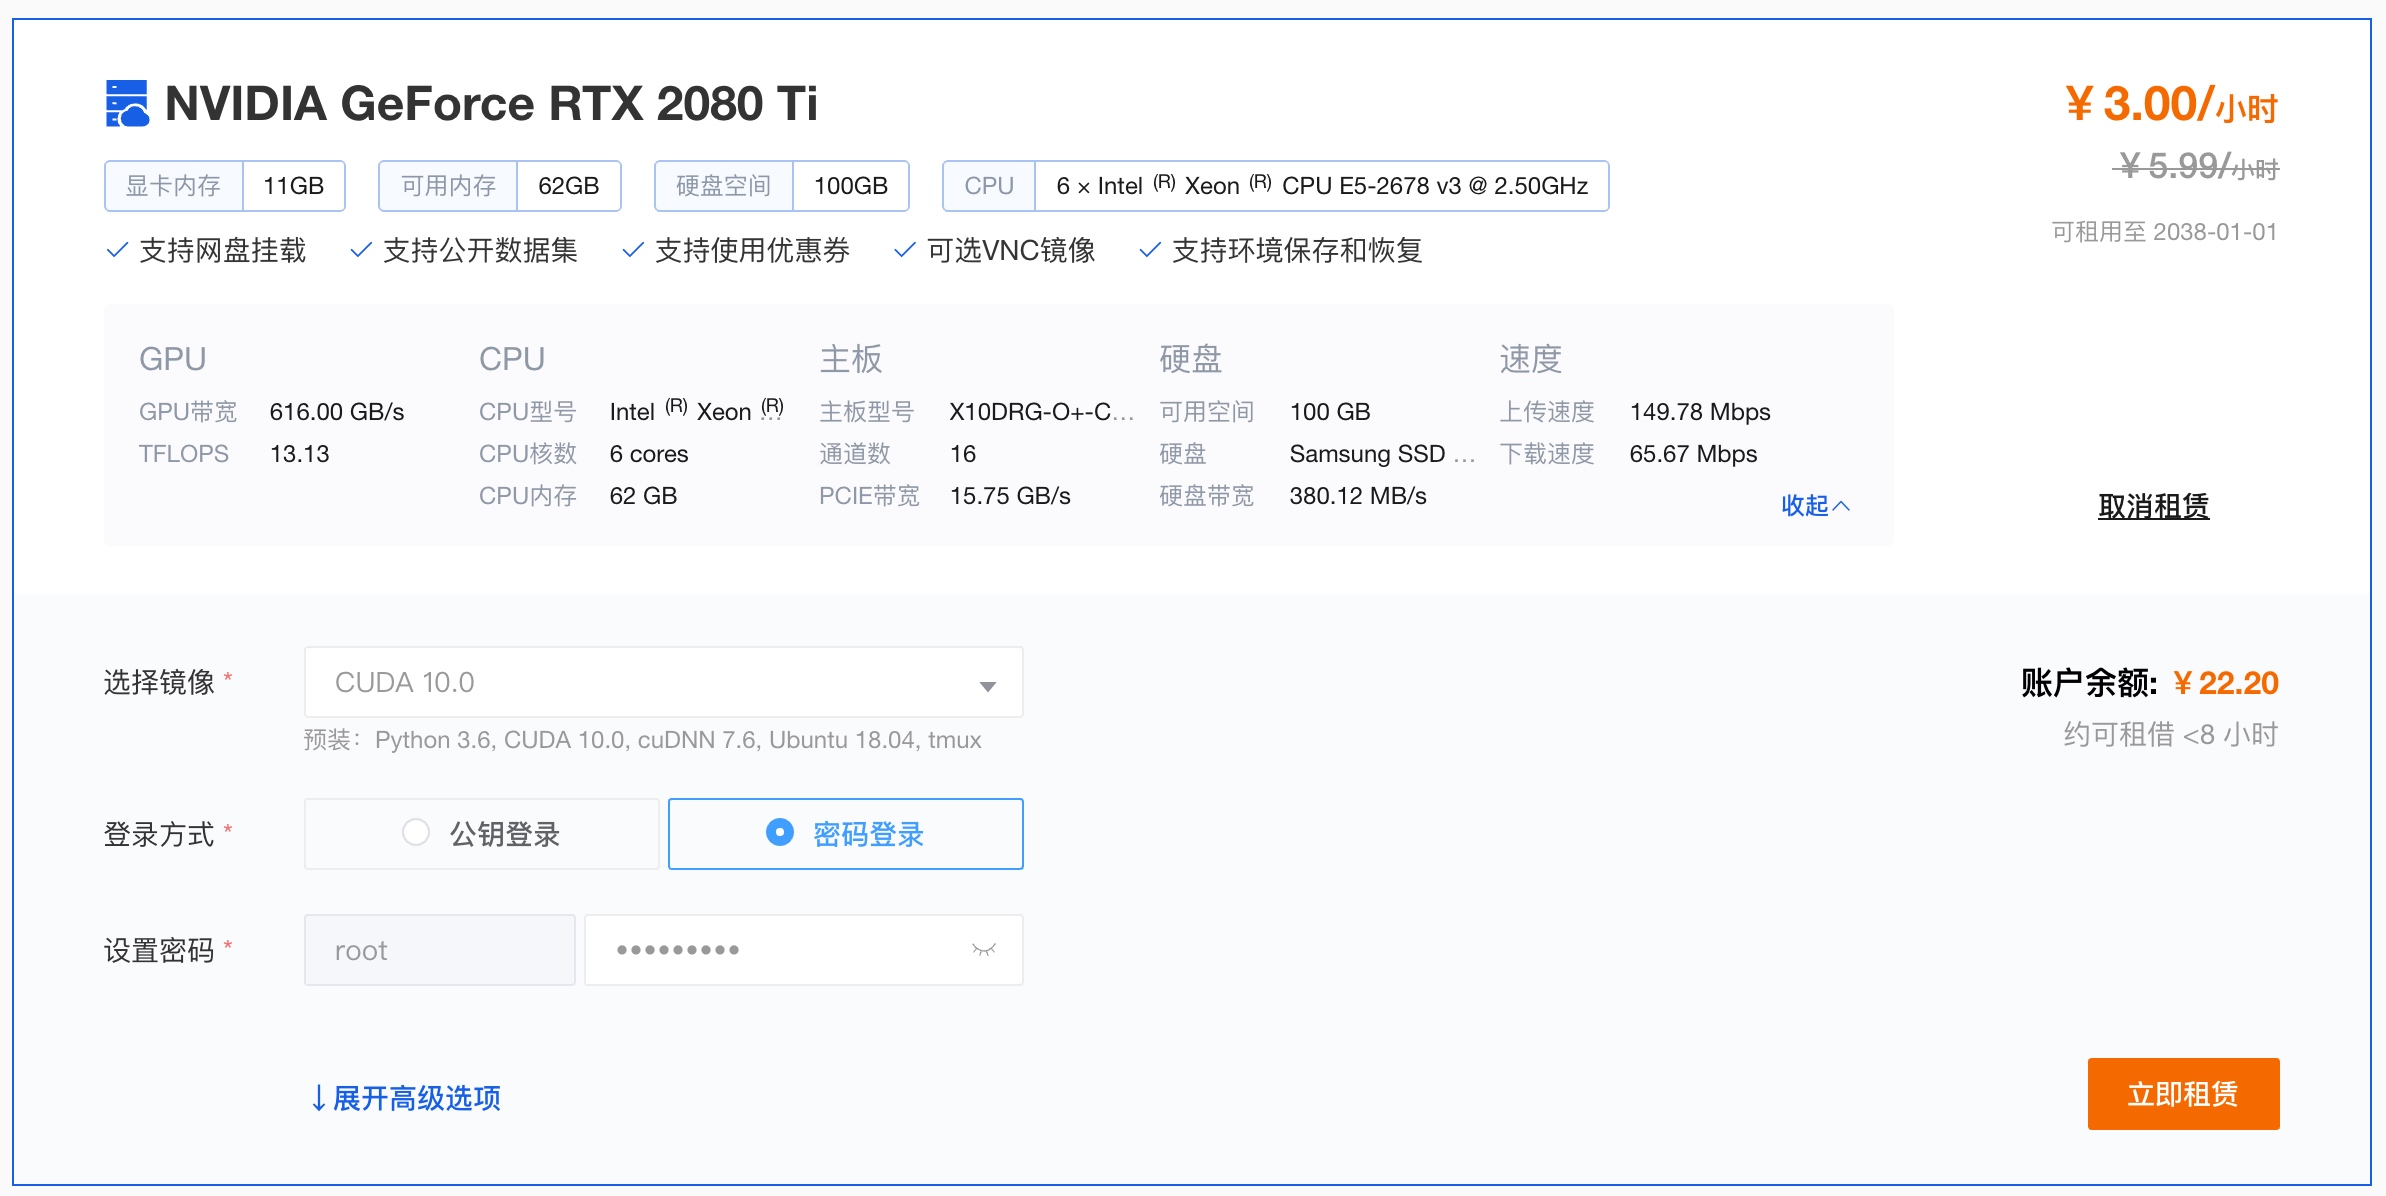
矩池云 GPU服务器:https://matpool.com/
captcha_trainer 使用过程
使用 ThinkPHP 调用 think-captcha 生成验证码
composer create-project topthink/think tp
cd tp
composer require topthink/think-captcha
php think run
修改 think-captcha 源码,将验证码存储到 Session
在vendor/topthink/think-captcha/src/Captcha.php:195插入以下代码Session::set('captcha', implode('', $code), '');在控制器内打印验证码
public function code() {
    $code = Session::get('captcha', '');
    echo $code;
}
使用 Python 抓取图片验证码样本,按照 captcha_trainer 默认规则重命名保存
import requests import threading import os import hashlib # def md5(s, salt=''): new_s = str(s) + salt m = hashlib.md5(new_s.encode()) return m.hexdigest() # def get_captcha(): session = requests.session() for i in range(0, 100000): try: content = session.get('http://x.com/captcha?'+str(i)) if content.status_code != 200: continue code = session.get('http://x.com/index/Home/code') if code.status_code != 200: continue filename = '{}_{}.png'.format(code.text, md5(content.content)) with open(os.path.join('captcha_images', filename), 'wb') as f: f.write(content.content) f.close() except Exception as e: print(str(e)) # for i in range(1, 20): t = threading.Thread(target=get_captcha, args=()) t.start()- 租用矩池云 RTX 2080 Ti 的GPU服务器进行训练

使用 captcha_trainer 进行训练
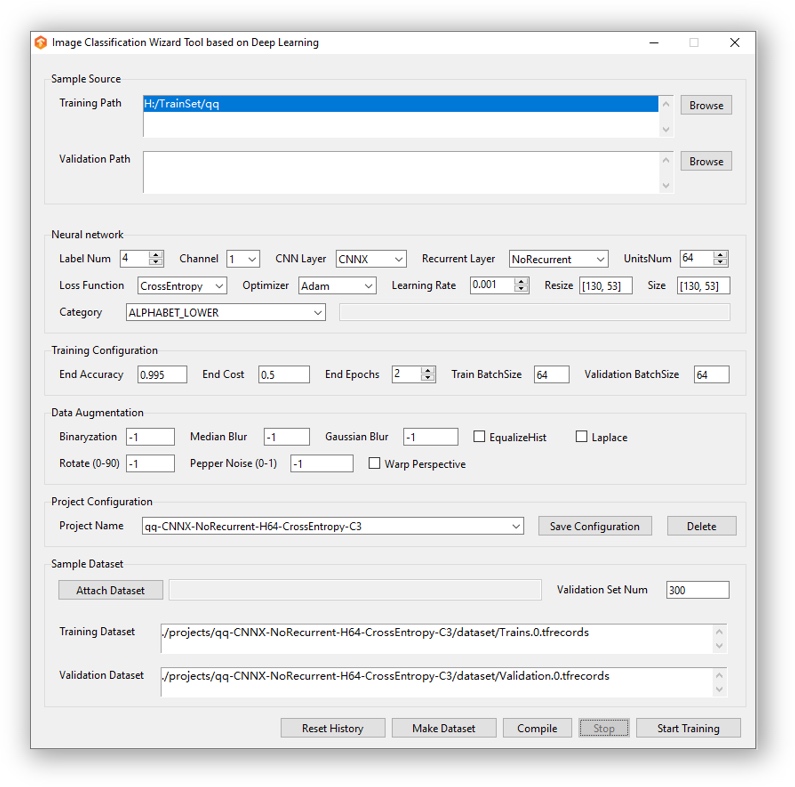
配置训练环境及项目
pip3 install -r requirements.txt pip3 install tensorflow-gpu # tensorflow模块需独立安装 mkdir -p projects/{project name}/ vi projects/{project name}/model.yamlmodel.yaml模板参数介绍请参考 captcha_trainer 项目介绍,可以用 Windows 编译版生成后上传至服务器,需保持项目名一致。项目名 TP-CNNX-GRU-H64-CTC-C1
./projects/TP-CNNX-GRU-H64-CTC-C1/model.yaml# - requirement.txt - GPU: tensorflow-gpu, CPU: tensorflow # - If you use the GPU version, you need to install some additional applications. System: MemoryUsage: 0.8 Version: 2 # CNNNetwork: [CNN5, ResNet, DenseNet] # RecurrentNetwork: [CuDNNBiLSTM, CuDNNLSTM, CuDNNGRU, BiLSTM, LSTM, GRU, BiGRU, NoRecurrent] # - The recommended configuration is CNN5+GRU # UnitsNum: [16, 64, 128, 256, 512] # - This parameter indicates the number of nodes used to remember and store past states. # Optimizer: Loss function algorithm for calculating gradient. # - [AdaBound, Adam, Momentum] # OutputLayer: [LossFunction, Decoder] # - LossFunction: [CTC, CrossEntropy] # - Decoder: [CTC, CrossEntropy] NeuralNet: CNNNetwork: CNNX RecurrentNetwork: GRU UnitsNum: 64 Optimizer: RAdam OutputLayer: LossFunction: CTC Decoder: CTC # ModelName: Corresponding to the model file in the model directory # ModelField: [Image, Text] # ModelScene: [Classification] # - Currently only Image-Classification is supported. Model: ModelName: TP-CNNX-GRU-H64-CTC-C1 ModelField: Image ModelScene: Classification # FieldParam contains the Image, Text. # When you filed to Image: # - Category: Provides a default optional built-in solution: # -- [ALPHANUMERIC, ALPHANUMERIC_LOWER, ALPHANUMERIC_UPPER, # -- NUMERIC, ALPHABET_LOWER, ALPHABET_UPPER, ALPHABET, ALPHANUMERIC_CHS_3500_LOWER] # - or can be customized by: # -- ['Cat', 'Lion', 'Tiger', 'Fish', 'BigCat'] # - Resize: [ImageWidth, ImageHeight/-1, ImageChannel] # - ImageChannel: [1, 3] # - In order to automatically select models using image size, when multiple models are deployed at the same time: # -- ImageWidth: The width of the image. # -- ImageHeight: The height of the image. # - MaxLabelNum: You can fill in -1, or any integer, where -1 means not defining the value. # -- Used when the number of label is fixed # When you filed to Text: # This type is temporarily not supported. FieldParam: Category: ['2', '3', '4', '5', '6', '7', '8', 'a', 'b', 'c', 'd', 'e', 'f', 'h', 'i', 'j', 'k', 'm', 'n', 'p', 'q', 'r', 's', 't', 'u', 'v', 'w', 'x', 'y', 'z', 'A', 'B', 'C', 'D', 'E', 'F', 'G', 'H', 'J', 'K', 'L', 'M', 'N', 'P', 'Q', 'R', 'T', 'U', 'V', 'W', 'X', 'Y'] Resize: [224, 70] ImageChannel: 1 ImageWidth: 224 ImageHeight: 70 MaxLabelNum: 4 OutputSplit: AutoPadding: True # The configuration is applied to the label of the data source. # LabelFrom: [FileName, XML, LMDB] # ExtractRegex: Only for methods extracted from FileName: # - Default matching apple_20181010121212.jpg file. # - The Default is .*?(?=_.*\.) # LabelSplit: Only for methods extracted from FileName: # - The split symbol in the file name is like: cat&big cat&lion_20181010121212.png # - The Default is null. Label: LabelFrom: FileName ExtractRegex: .*?(?=_) LabelSplit: # DatasetPath: [Training/Validation], The local absolute path of a packed training or validation set. # SourcePath: [Training/Validation], The local absolute path to the source folder of the training or validation set. # ValidationSetNum: This is an optional parameter that is used when you want to extract some of the validation set # - from the training set when you are not preparing the validation set separately. # SavedSteps: A Session.run() execution is called a Step, # - Used to save training progress, Default value is 100. # ValidationSteps: Used to calculate accuracy, Default value is 500. # EndAcc: Finish the training when the accuracy reaches [EndAcc*100]% and other conditions. # EndCost: Finish the training when the cost reaches EndCost and other conditions. # EndEpochs: Finish the training when the epoch is greater than the defined epoch and other conditions. # BatchSize: Number of samples selected for one training step. # ValidationBatchSize: Number of samples selected for one validation step. # LearningRate: [0.1, 0.01, 0.001, 0.0001] # - Use a smaller learning rate for fine-tuning. Trains: DatasetPath: Training: - ./projects/TP-CNNX-GRU-H64-CTC-C1/dataset/Trains.0.tfrecords Validation: - ./projects/TP-CNNX-GRU-H64-CTC-C1/dataset/Validation.0.tfrecords SourcePath: Training: - /root/captcha_images Validation: ValidationSetNum: 300 SavedSteps: 100 ValidationSteps: 500 EndAcc: 0.95 EndCost: 0.5 EndEpochs: 2 BatchSize: 64 ValidationBatchSize: 300 LearningRate: 0.001 # Binaryzation: The argument is of type list and contains the range of int values, -1 is not enabled. # MedianBlur: The parameter is an int value, -1 is not enabled. # GaussianBlur: The parameter is an int value, -1 is not enabled. # EqualizeHist: The parameter is an bool value. # Laplace: The parameter is an bool value. # WarpPerspective: The parameter is an bool value. # Rotate: The parameter is a positive integer int type greater than 0, -1 is not enabled. # PepperNoise: This parameter is a float type less than 1, -1 is not enabled. # Brightness: The parameter is an bool value. # Saturation: The parameter is an bool value. # Hue: The parameter is an bool value. # Gamma: The parameter is an bool value. # ChannelSwap: The parameter is an bool value. # RandomBlank: The parameter is a positive integer int type greater than 0, -1 is not enabled. # RandomTransition: The parameter is a positive integer int type greater than 0, -1 is not enabled. DataAugmentation: Binaryzation: -1 MedianBlur: -1 GaussianBlur: -1 EqualizeHist: False Laplace: False WarpPerspective: False Rotate: -1 PepperNoise: -1.0 Brightness: False Saturation: False Hue: False Gamma: False ChannelSwap: False RandomBlank: -1 RandomTransition: -1 RandomCaptcha: Enable: False FontPath: # Binaryzation: The parameter is an integer number between 0 and 255, -1 is not enabled. # ReplaceTransparent: Transparent background replacement, bool type. # HorizontalStitching: Horizontal stitching, bool type. # ConcatFrames: Horizontally merge two frames according to the provided frame index list, -1 is not enabled. # BlendFrames: Fusion corresponding frames according to the provided frame index list, -1 is not enabled. # - [-1] means all frames Pretreatment: Binaryzation: -1 ReplaceTransparent: True HorizontalStitching: False ConcatFrames: -1 BlendFrames: -1 ExecuteMap: {}打包训练集后开始训练
python3 make_dataset.py
python3 trains.py
Linux 训练环境强制结束任务
因为 think-captcha 随机调用系统字体生成图片验证码,部分字体显示只有大写字母,与 think-captcha 生成的验证码存在大小写偏差,导致 captcha_trainer 训练正确率只能维持在 0.6 左右,无法满足结束训练任务的 0.95 正确率,但忽略大小写后的正确率已满足需求,所以需要强制结束训练任务,编译模型。
Windows 环境下可以直接点击 Stop 按钮结束任务后再点击 Compile 按钮编译模型。

Linux 环境结束任务需要修改
trains.py代码,简单分析后发现trains.py共有两处正确率判断trains.py:308 # 满足终止条件但尚未完成当前epoch时跳出epoch循环 if self.achieve_cond(acc=accuracy, cost=batch_cost, epoch=epoch_count): breaktrains.py:314 if self.achieve_cond(acc=accuracy, cost=batch_cost, epoch=epoch_count): # sess.close() tf.compat.v1.keras.backend.clear_session() sess.close() self.compile_graph(accuracy) tf.compat.v1.logging.info('Total Time: {} sec.'.format(time.time() - start_time))找到代码后直接简单粗暴的把判断条件改成
1==1让条件成立即可结束任务trains.py:308 # 满足终止条件但尚未完成当前epoch时跳出epoch循环 if 1==1: breaktrains.py:314 if 1==1: # sess.close() tf.compat.v1.keras.backend.clear_session() sess.close() self.compile_graph(accuracy) tf.compat.v1.logging.info('Total Time: {} sec.'.format(time.time() - start_time))captcha_trainer 支持中断任务恢复,修改代码后按
Ctrl+C结束任务,重新执行python3 trains.py,初始化后将直接结束训练任务,编译模型。
部署验证码识别接口
使用 captcha_platform 项目进行 docker 部署
将 captcha_trainer 训练后编译生成的模型复制到 captcha_platform 项目中
mv -rf captcha_trainer/out/* captcha_platform/构建并启动 docker
cd captcha_platform/
docker build .
docker run -d -p 19952:19952 [image:tag]
识别测试
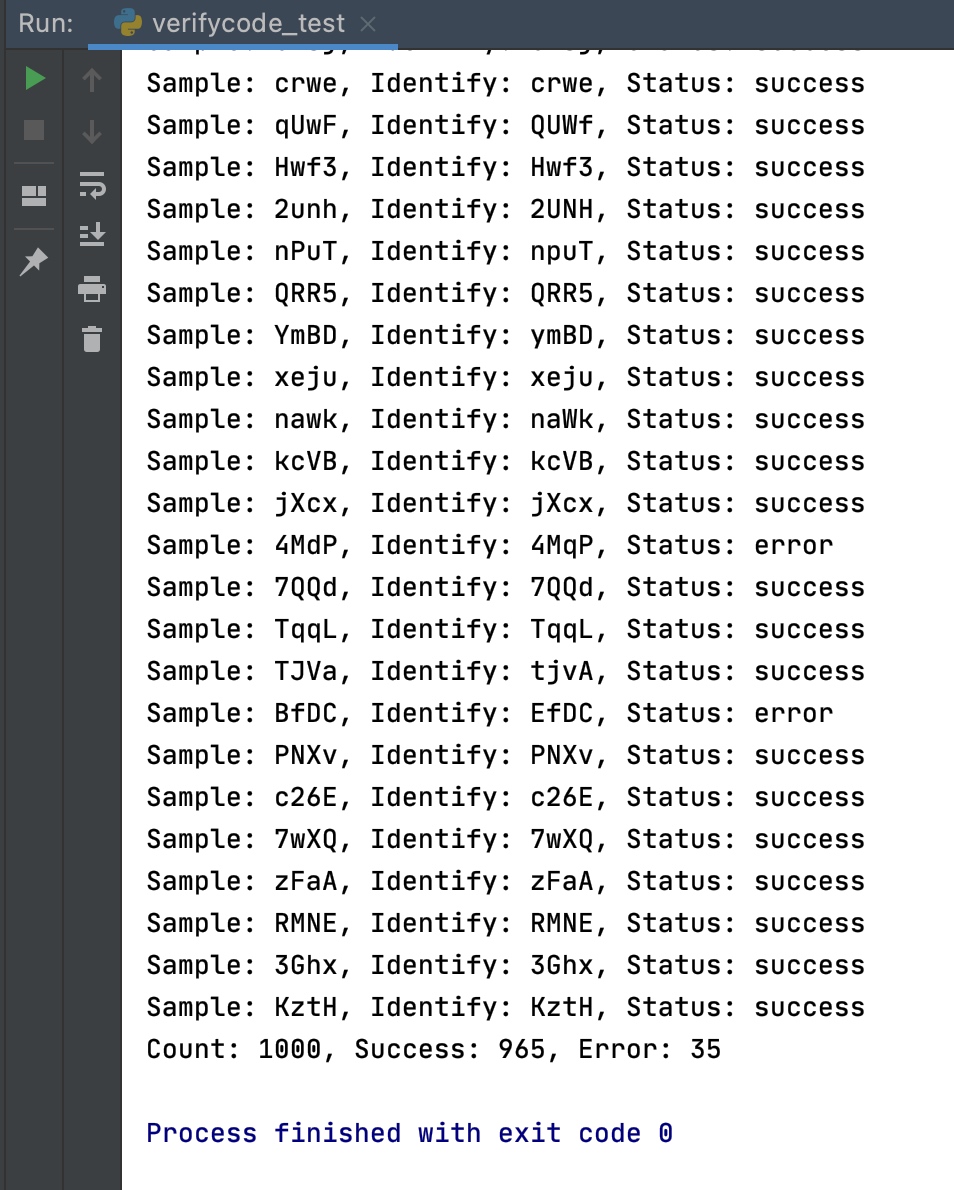
13万 think-captcha 图片验证码样本经过约 11 个小时的训练后,使用未经过训练的新样本进行识别测试,识别成功率在 95% 左右
使用 Python 脚本进行识别测试
import requests
import base64
import os
import re
#
dir = 'test-1' # 未经过训练的图片验证码样本目录
success = 0
error = 0
count = 0
file_list = os.listdir(dir)
#
for i in range(0, 1000):
    filename = file_list[i]
    origin = re.match(r'.*?(?=_.*\.)', filename).group()
    if not origin:
        continue
    src = os.path.join(dir, filename)
    img = base64.b64encode(open(src, 'rb').read())
    post_data = {
        'image': img,
        'model_name': 'TP-CNNX-GRU-H64-CTC-C1'
    }
    res = requests.post('http://localhost:19952/captcha/v1', data=post_data)
    json_res = res.json()
    # 忽略大小写
    if json_res['code'] == 0 and str(json_res['message']).upper() == origin.upper():
        print('Sample: {}, Identify: {}, Status: {}'.format(org, json_res['message'], 'success'))
        success += 1
    else:
        print('Sample: {}, Identify: {}, Status: {}'.format(org, json_res['message'], 'error'))
        error += 1
    count += 1
print('Count: {}, Success: {}, Error: {}'.format(count, success, error))
测试结果
模型下载
链接: https://pan.baidu.com/s/1e0quRSqMV8lP6XXoS_Ty1g 提取码:sg6c